PowerApps gallery driven by managed metadata
In this blog post we will have a look at how to display managed metadata terms as labels in a gallery in PowerApps.
The idea behind this is that administrators can easily add/remove terms with which, the data in the PowerApps gallery can be easily controlled without editing the published app.
In this post we will create 2 input forms:
- A simple input form in which we will collect the number of licenses needed for each software.
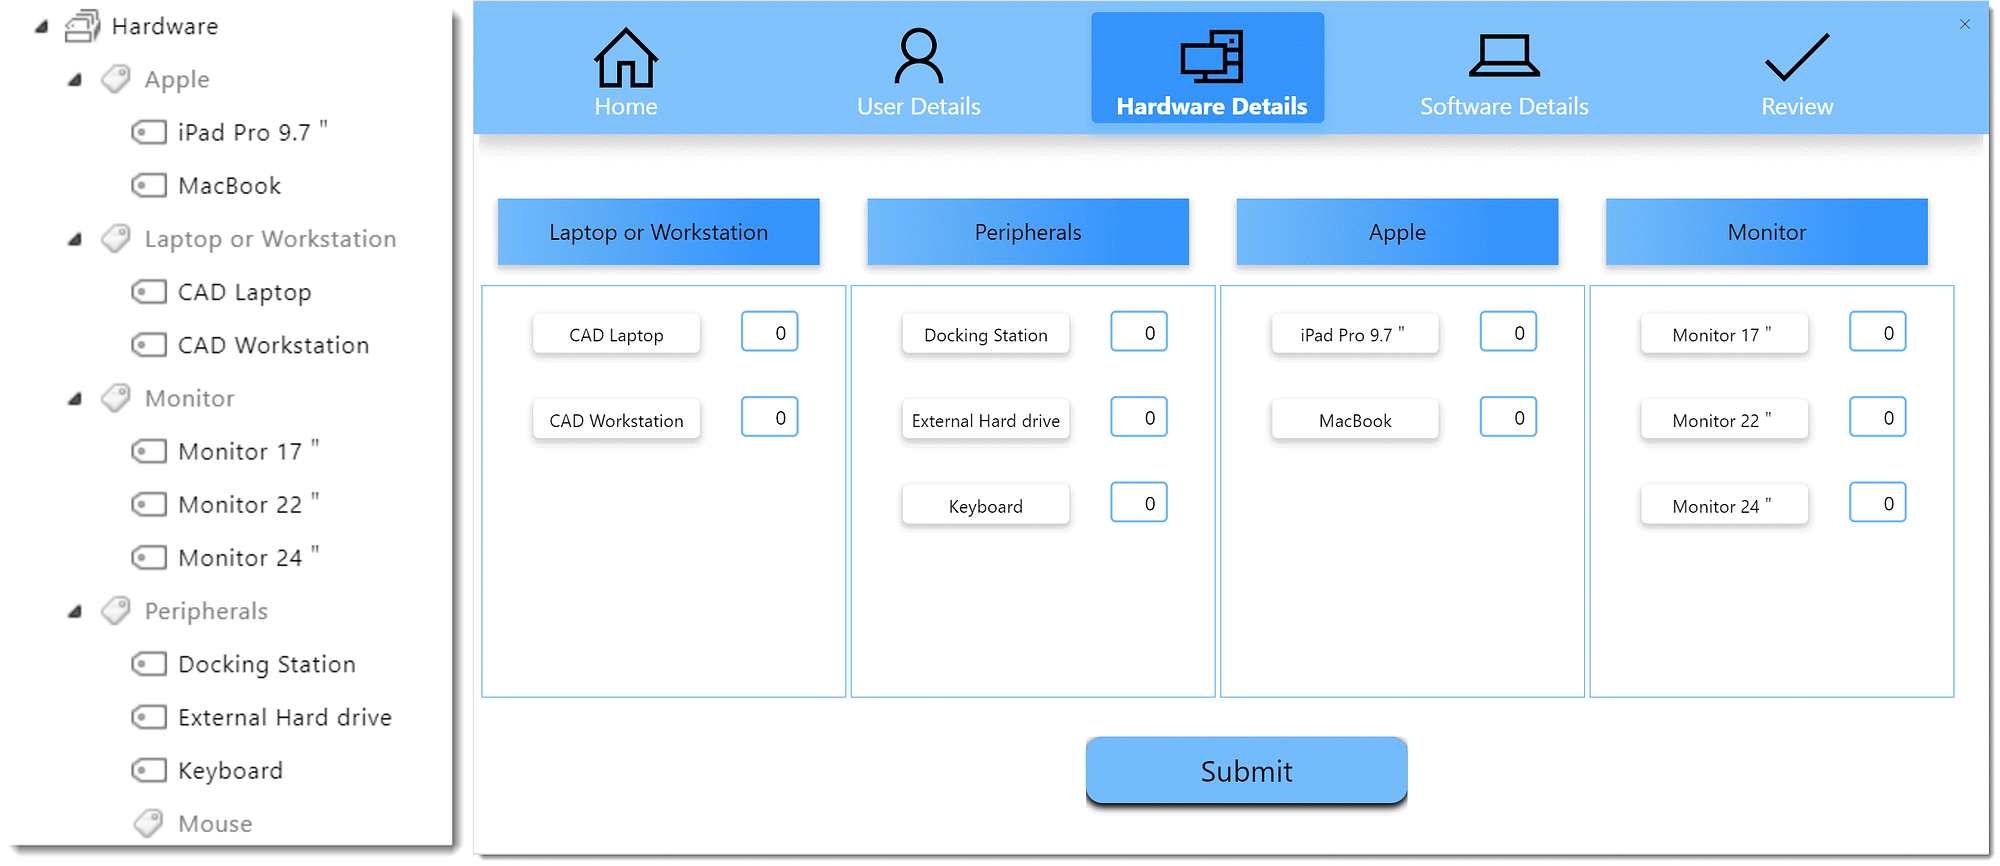
- Another input form (showing the parent child hierarchy of the terms) in which we will collect the numbers needed for each hardware (as shown in the image above).
Simple input form
Let’s see how to create a simple form first, where we display the terms that are at the top level and have no child terms. For this we will create a new termset called “Software” termset and the end result would be as shown below.

In this example we will capture the number of licenses needed for software per user.
Managed metadata
We will start by creating the following term structure.

SharePoint list
Let’s now create a SharePoint list (Service Desk Requests) with the following columns:
If you choose a different name for the list, please update the formula in the sections below accordingly.
PowerApps collections to hold data
Create a blank canvas app and add the SharePoint list that we created earlier as the data source.
Next, we create a collection that will hold the Software data. Let’s name this collection as “AllSoftware” and store the data from the “Software” termset. For this we use the Software column of the list as it is bound to the Software termset.
We then create another collection which will be a copy of “AllSoftware” with an extra column to hold “Number of licenses”. Let’s name this as “SelectedSoftware”. We use the formula below to create both of them in the OnStart property of the App.
Quick tip (thanks to Todd Baginski): You can add a button in another screen and add the above formula to the OnSelect property of that control. You can then click on that button to simulate the app start and hence there won’t be a need to close and re-open the app.
If we look at the collection, we can see that there will be a Label column that has the name of the software we need to display and there will also be a TermGuid column which is unique to each item. We will be using these columns later.
PowerApps gallery to display data
We then add a blank vertical gallery and set the items property of that gallery to “SelectedSoftware” collection.

Now that we have the software items we want to display and the number of licenses associated with them, we need to add controls in the gallery to show them. For that we need to insert 2 controls in the gallery:
- HTML text control (found under the Text group) to display the name of the software.
- Text box control to display the number of licenses.

Click on the HTML text control and add the below formula in the “HtmlText” property of that control. This will display the “Label” column from the “SelectedSoftware” collection which contains the name of the software (i.e. the term label).
Thanks to this tweet from Geetha Sivasailam for the tips on UI.
Now for number of licenses, rename the text input control to “tbxLicenses” and set it’s “Default” property to “ ThisItem.’Number of licenses’ ”. After that set it’s “OnChange” property to the formula shown below. This will make sure that the “SelectedSoftware” collection gets updated when the text is updated.
We are using TermGuid property which is unique to each term (software), so that we update the number of licenses of the correct corresponding term (software) in the collection.
We can update the colours and other UI aspects of in the HTML text control and the text box as per the requirement.
Saving the data
Once the data is entered in the form, we will save it back to SharePoint list so that it can be consumed else where. We store the following in SharePoint list
- Software column — Those terms for which have 1 or more number of licenses
- Software JSON — A JSON array which contains name of the software and number of licenses for each
- Software PA format — A pipe separated string that contains name of the software and number of licenses for each (This data will be used in the next blog post)
To do that let’s add a button called “Submit” and set it’s OnSelect property with the following formula
Firstly, we create collection called “RequiredSoftware” that will have only those softwares for which number of licenses is greater than 0. After that we use “Patch” function to create a new item in the SharePoint list in which we set “Software JSON” to the JSON format of the “RequiredSoftware” collection using the JSON function. We also set the “Software PA Format” to a pipe separated string by using the “Concat” function that loops through the “RequiredSoftware” collection.
Clicking on “Submit” will create a new item and store the data in the respective columns.
A couple of things to note
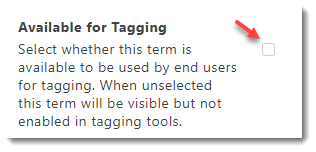
If we mark a term as “Not available for tagging” then it won’t be a part of the collection. So depending upon the requirement, we can show/hide terms from being displayed.
In the formula for “Submit”, we use the “SelectedSoftware” collection which has the “Number of licenses” column that SharePoint won’t recognize. However, when we submit that collection, PowerApps/SharePoint is clever enough to ignore that column without us doing anything (Thanks to Paul Clumsee for letting this know in one of his YouTube videos).
An input form with more options
Let’s now look into creating a form that will have labels listed under the category they belong to i.e. they will have a parent child relationship.
Imagine this to be as a horizontally repeating form that we created earlier.
Most of the formula/concepts that will be used in this form will be similar to the previous one. We will be looking for the following end result:

Managed metadata
For this we need to create a new termset called “Hardware” with the following structure. Note that the parent terms have been disabled (i.e. marked as not available for tagging).

SharePoint list
After that we need to the following columns to the SharePoint list created earlier
PowerApps collections to store data
We need create a collection that will hold the Hardware data. Let’s name this collection as “AllHardware” and store the data from the “Hardware” column. This collection will have all the child items only. We will get the parent in a slightly different way.
We then create another collection which will be a copy of “AllHardware”. Let’s name this as “SelectedHardware”. This collection will the following 2 extra columns:
- Number of items — This will hold the number for each hardware needed.
- Parent — This will contain the parent of the term. We get this from the “Path” of the term.
Please add the formula below in the OnStart event of the app.
If we look at the “SelectedHardware” collection we can see that the last part in the “Path” column is the parent term of each term. That is what we store in the new “Parent” column.
PowerApps gallery to display data
To display the data we need 2 galleries — one to display the data present in the “Parent” column and then a child gallery which display the child terms under each parent.
Add a gallery and name it as “galleryParent”. We need to group the data in “SelectedHardware” collection by parent so that we can get the data in the required grouped order. To do that, change it’s “Items” property of “galleryParent” to
With this we get a collection that is grouped by the “Parent” column. The “HardwareDetail” in each row will be a collection of all the child terms under the parent. We will use that as the source for the second gallery.
To display the parent term in “galleryParent” add an HTML text input in the gallery and set it’s HtmlText property to
To display the child terms under the parent, add a gallery (within galleryParent) and rename it as “galleryChild”.
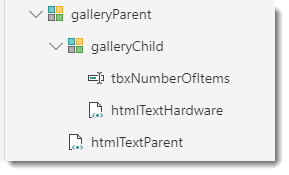
Set the Items property of this gallery to “ThisItem.HardwareDetail”.

Now that we have the child terms set as source for the gallery, we need to display those. To do that, add an HTML text input control to “galleryChild” and set it’s HtmlText property to
This will display the “Label” i.e. the name of the term.
Also add a text box control (tbxNumberofItems) to the gallery and set the following properties of that control:
- Default — ThisItem.’Number of items’
- OnChange — (like we did earlier for the Software gallery)
Saving the data
All that is left to do now is submitting the captured data. To do that add a new button to the screen and set it’s OnSelect property to
Like the submit functionality for software data, we get only those hardware for which the number of items is greater that 0. We store the JSON format so that it can be used elsewhere and we also store the data in pipe separated format so that it can be read in PowerApps (next blog post).
Summary
We have seen that to display the terms in PowerApps we make use of the choices from a column that is connected to a termset. We have also seen how we can make use of HTML text control to add some nice UI in PowerApps. Hopefully this post helps you to create controlled/monitored data in PowerApps.

